Setting Up Your Malware Analysis Environment
This week, I’ve been digging into malware analysis based on my curiousity for a piece of malware that caught my attention. I wanted to run it, but I knew that I should take the propper precautions. In this tutorial, I’m going to show you how to run a malware analysis environment to find out the inner mechanisms of malware. The applications of malware analysis heavily side with security. To find out how malware works is the key to protecting against it. So let’s get started!
Things you will need
- Hypervisor: The virtual machine environment runs on a hypervisor, and there are a few to choose from such as VMware or a free open-source option called VirtualBox.
- Windows 10 VM: You’ll need a Windows 10 VM operating system and you can download it from the Microsoft website.
- Flare-VM: Flare-VM is a customizable windows-based package that contains tools for malware analysis, incident response, and pentesting. You can download it here.
Note: We’ll be skipping installation instructions of the Hypervisor, but just know that I’ll be using VirtualBox for this example.
Installing The Windows 10 VM
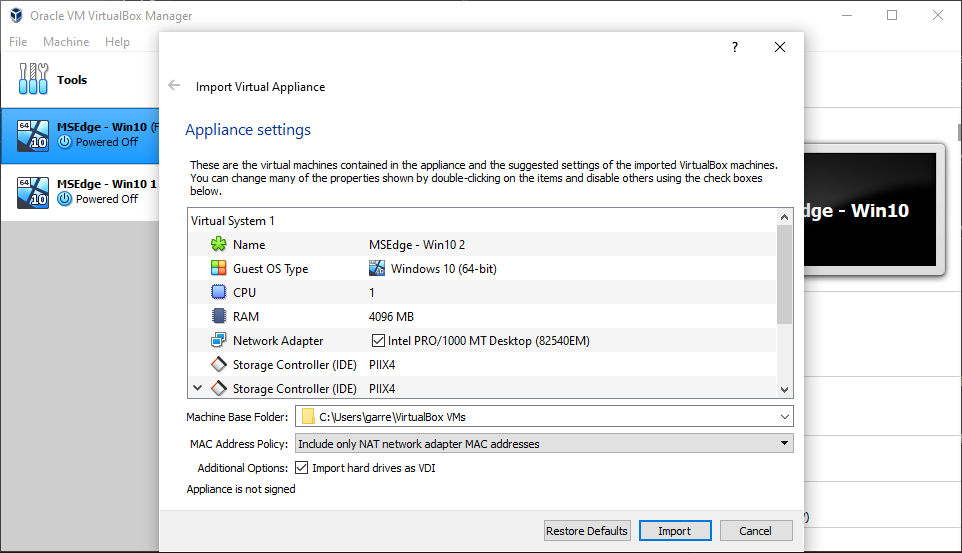
Now that VirtualBox or the Hypervisor of your choice is installed and ready to go, you need to unzip the Windows 10 Virtual Machine folder you’ve downloaded and extract the contents. Once you’ve done that, click on the MSEdge - Win10.ova file inside. You should be prompted by your hypervisor to import the VM to your Hypervisor Manager.

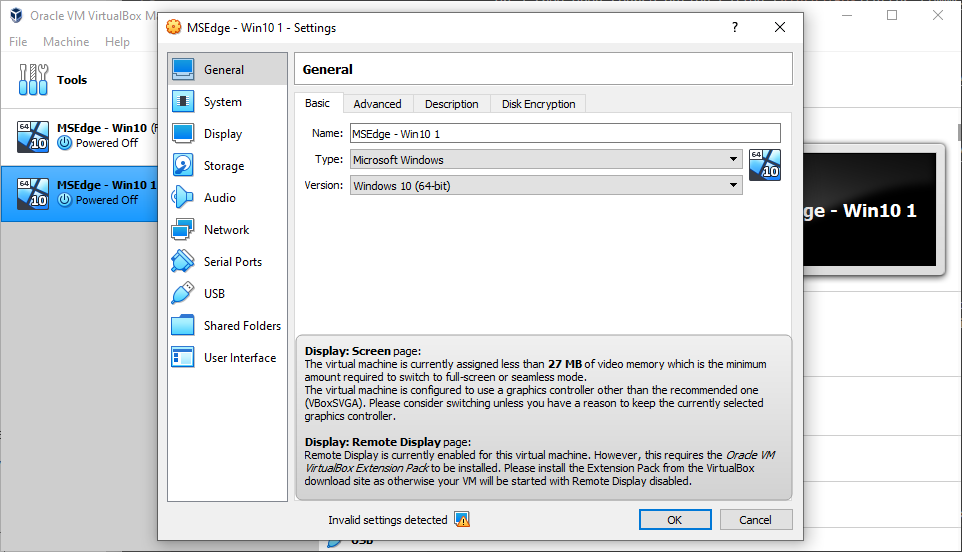
There are a few warnings you should look out for once it’s been imported at least if you are using VirtualBox. You will need to click on the settings tab of your newly imported virtual machine and hover over the Invalid Settings Detected warning at the bottom of the settings box. You may find there are a number of problems you have to fix before moving on to the next step. You should see something similar to the image below.

Take A Snapshot Of The Windows 10 VM
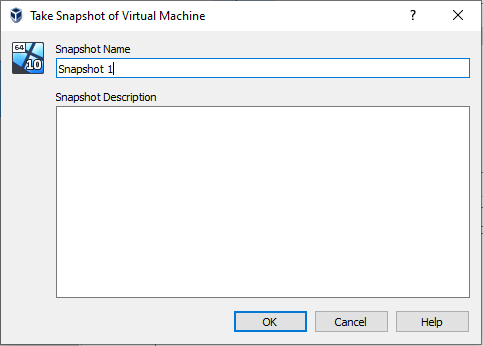
Before you power up the VM, you’ll want to take a snapshot, because once you power it on, Microsoft will start the VM’s 90 day period and once exceeded, the VM will be expired and unusable. Not only this, but if anything goes wrong and your environment is compromised by malware, you will have to revert to the clean snapshot anyway. Once reverted, the 90 period will act as if it began again.

VirtualBox Snapshot Creation.
Add A Temporary Shared Folder
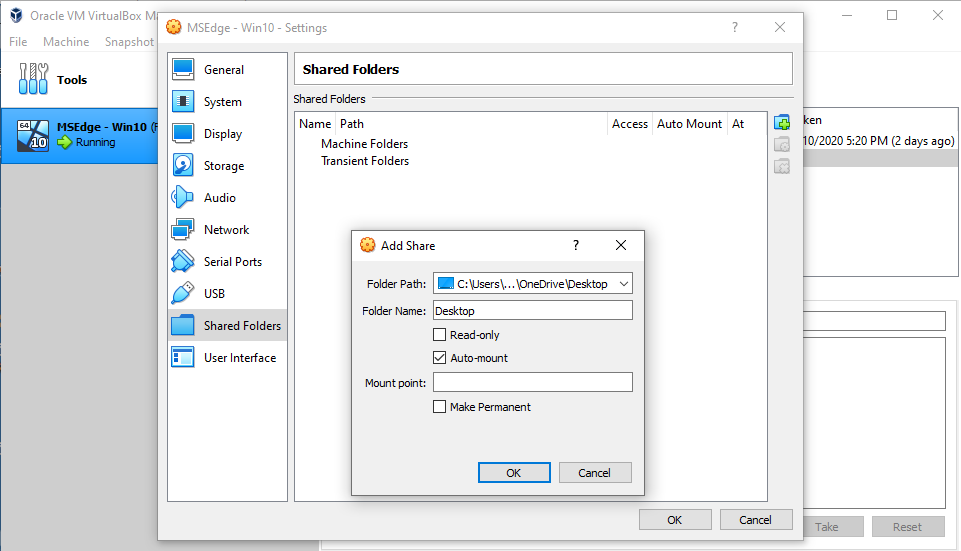
Once you’ve completed the above task, you’ll need to have a way of getting the Flare-VM Folder to your VM without internet and that can be accomplished with a shared folder setting in your VM configurations as you will see in the photo below.

Note: you should change your network adapter to bridged for the installation of Flare-VM but once completed, you should changed it to Host-Only Adapter for security purposes.
Now that you’ve got all of the warnings squared away, created a snapshot, created a shared folder, and configured the network configuration you’re ready to power up! Power up the Windows 10 VM and log in using the default password “Passw0rd!”. Go to your Virtual Machine’s shared folder and extract the Flare-VM onto your desktop or wherever you feel comfortable. I’d like to make it very clear that you are installing the package inside your VM and Not on your host computer. The rest of this tutorial will be carried out inside the VM. Open up a powershell Window in administrator mode. You’re going to have to unrestrict the execution policy so that the flare-vm script can do it’s job without being interrupted by restriction policies. You can do this by typing the command below.
Set-ExecutionPolicy unrestricted
Type “y” and click enter. Next, make sure you are in the Flare-VM folder to run the command below.
.\install.ps1
It will prompt you for a user password in which you will provide the default password. Once this is done, you will have a great deal of malware and pentesting tools to work with to reverse engineer the malware of your choosing. Don’t forget to remove the shared folder in your settings and change your network configuration back to Host-Only Adapter.
Note: This can take a while to download and install all the packages it needs to complete the VM configuration.