Creating and Accessing an AWS CodeCommit Repository
This article will be a simple guideline to creating an AWS CodeCommit repository. Amazon has tons of different tutorials that can help with choosing the right source solution for your pipeline, however, I will be using CodeCommit for the sake of keeping all my resources within AWS and because I have HTTPS Git credentials for my user to use with AWS CodeCommit, and you’ll learn about that in this tutorial. You will need access to IAM services as well as CodeCommit access. This will be completed on the AWS Console.
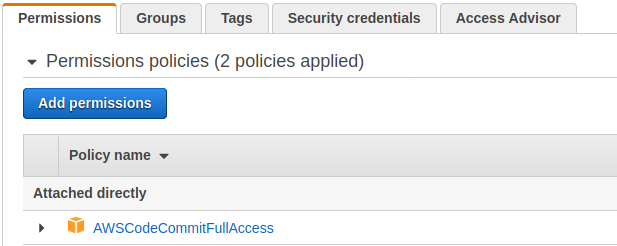
- Add AWSCodeCommitFullAccess Policy to desired user.
- Identity and Access Management > Users > YourUser > Permissions > AddPermissions
- AWS Managed Policy: AWSCodeCommitFullAccess

This will allow the user to interact with the CodeCommit Resource to the full extent, however, the user still requires access to the CodeCommit resource through the command line so they can use git as a way of publishing changes. This requires HTTPS Git Credentials to be created for that user.
- Create the HTTPS Git Credentials.
- Identity and Access Management > Users > YourUser > Security Credentials > Generate Credentials

- Identity and Access Management > Users > YourUser > Security Credentials > Generate Credentials
Make sure you download the credentials file because it will be need to be provided when you update the repository at all via command line.
- Create CodeCommit Repository.
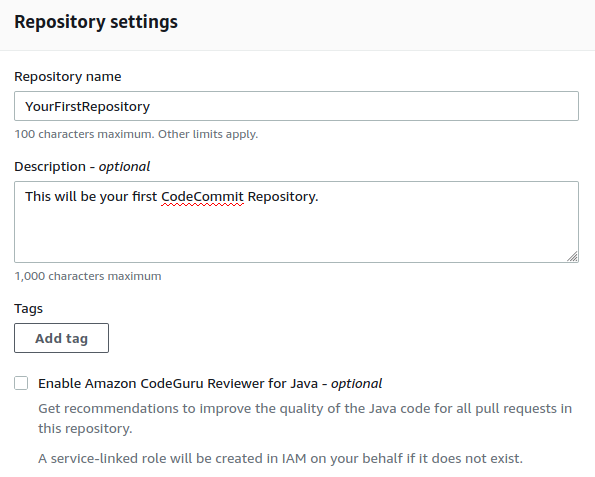
- Developer Tools > CodeCommit > Repositories > Create repository
- Add the name and also the optional description if you’d like.

- Clone the repository onto your local system.
- Make sure you’re on the HTTPS Connection Choice, because you did choose the HTTPS Credential route.
git clone https://git-codecommit.us-west-2.amazonaws.com/v1/repos/YourFirstRepositoryOnce this is all done, all that is left to do is add your code, commit your changes, and push to the master branch. Thanks for reading.
- Make sure you’re on the HTTPS Connection Choice, because you did choose the HTTPS Credential route.